

It’s wedding season! This past weekend I had a bachelorette party for one of my oldest friends (think U6 soccer). Her twin sister’s in-laws have a house on Nantucket and they were gracious enough to let us use it for a long weekend. For those of you who have never been, it’s one of the most beautiful, peaceful, and quaint places in the world. All the houses are shingled and gray from the sun. There are cobblestone streets and local shops. You ride bikes with baskets on them. I know, it’s adorable. We had a great time going to the beach, riding bikes to Siasconset, shopping in town, hanging out at Cisco Brewery, and eating amazing food. Our first dinner was at Cru, right on the docks, and I had the most unbelievable hot butter lobster roll. It seemed small at first, especially for the price (oh yeah, nothing is cheap here), but it was 150% worth it. The lobster was sweet and tender, the butter was hot and salty, and the brioche roll was to die for. It comes with a healthy pile of hand cut fries that were hot and delicious. Go and get it. You won’t be disappointed. We got ridiculous sandwiches from Something Natural (turkey, swiss cheese, sprouts, avocado, cucumbers, carrots, need I go on?), had a delicious brunch at Island Kitchen and ice cream in homemade waffle cones that you can smell down the street at The Juice Bar. Our last dinner was at Straight Wharf near the docks. They serve delicious (and yes, expensive) surf and turf. I ordered the swordfish and was not disappointed. Ah! I want to go back now.

Anyway! For the weekend, I knew I had to bring a baked good, but because we would be on the move constantly, I wanted to bring something easy to handle and quick to eat. I haven’t made cake pops in a very long time, so I decided that I would try them out again, bachelorette style! Full disclosure: these babies take a while, especially if you make the cake and frosting by hand (which I did, but you don’t need to). From start to finish, it took about 5-6 hours. Trust me when I tell you, though, that if you have the time, they are absolutely worth it.
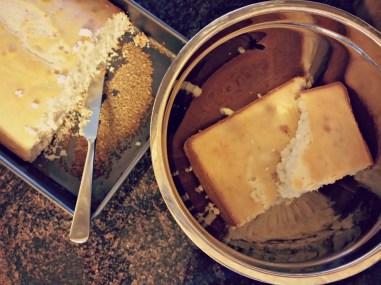
You want to start with a baked cake in a 9×13 pan. You can really choose any flavor of cake. In the past I’ve done red velvet (which are amazing), chocolate, and vanilla. Keep in mind that the candy color you use for the outside should help determine which cake flavor to make (if you want white cake pops, you will see through to a dark cake such as red velvet or chocolate, so I would suggest doing a white or yellow cake). The bride’s colors are mint and navy, so I made a white cake. I used Sweetapolita’s recipe for Super-Duper Vanilla Cupcakes here, but you can really use any cake recipe or a boxed cake mix. Similar to the cake, the frosting can be whatever you want, really. Just be aware of the color relative to the candy shell. I used a basic American buttercream recipe (found here). You can also use the ready-made frosting sold at any grocery store.
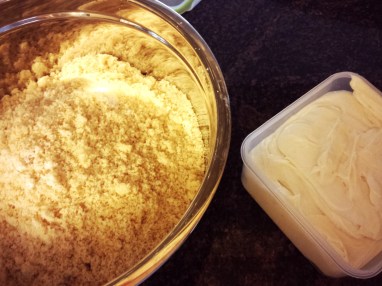
Once the cake is baked and has cooled, you want to turn it into crumbs. You can use your hands, which I have done in the past, or a food processor, which I used this time and was very easy. Then you’ll want to add the frosting. The recipe I used above produced too much and I ended up only using about half. Add a big spoonful of frosting to the crumbs and start mixing together either with a spoon or your hands (much more effective, and fun). You can always add more frosting. You want the consistency to be pliable and doughy, but not sticky or gooey (see below).
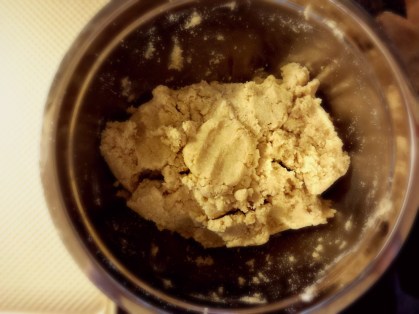
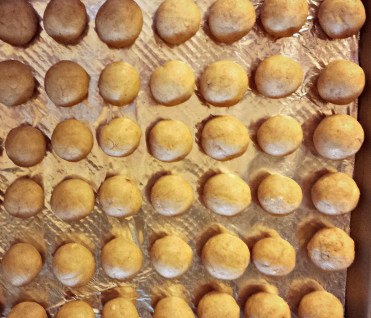
I chilled the cake/frosting mixture for about 30 minutes, just so the frosting stiffened enough to be able to scoop and roll easily. Line a baking sheet with parchment paper or aluminum foil. Used a small cookie scoop and form a good ball using your hands. Put completed balls on the cookie sheet. Continue until all the “dough” is gone. I was able to make 60 small cake balls from my cake recipe. Chill the cake balls for another 30 minutes – you don’t want them to fall apart when you insert the lollipop stick.
Before you take the baking sheet out of the fridge, fill a sauce pan with a couple inches of water and heat to a simmer. In a heat-proof bowl add a handful of candy melts (I used white). Place this bowl over the simmering water and stir the candy until it is completed melted and smooth. At this point, shut the stove off, take out the cookie sheet of cake ball from the fridge, and have your lollipop sticks ready to go. Coat about 1 inch of the end of a stick with the melted candy and slowly insert that end into a cake ball. You may have to twist it a bit. Make sure not to go all the way through. Once all of the cake balls have sticks, place them back in the fridge to ensure the candy hardens, another 30 minutes, or so.
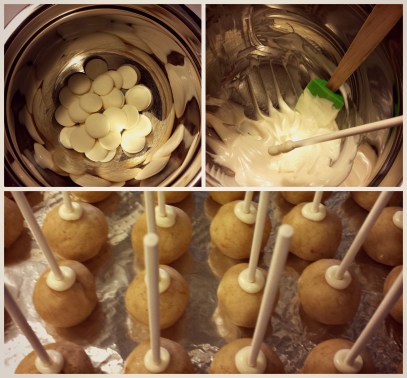
During this time, you can set up to coat the cake pops. Turn the stove back on to get the water simmering again. Depending on the color, you may need a new heat-proof bowl. Add half a bag of the candy melts and set it over the simmering water. Stir occasionally until melted and smooth. If you have them, you will want to get any decorations ready (sprinkles, sugar, etc.). I also recommend having a piece of Styrofoam or floral foam at the ready to stick the cake pops in after they are coated. Be sure to turn the stove top to low or off completely. If the candy gets overheated it will thicken and clump. **If this happens, add a teaspoon of canola or vegetable oil until it thins again.
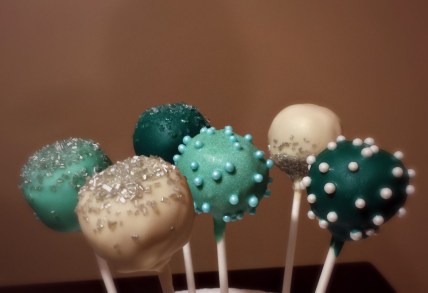
When the candy is ready, remove the tray of cake pops from the fridge. One at a time, dip the pop into the melted candy. You may want a spoon or rubber spatula to help push the melted candy to coat the whole pop. Once it’s completely coated, very gently tap and turn the pop on the edge of the bowl until the excess melted candy drips off. I like to twist it as I tap so that the coating is even and the little excess left on the pop finishes at the bottom, near the stick, in a cute little point. Wait 10-15 second before topping with any sprinkles or sugar. You don’t want the candy to still be hot that the sprinkles will slide and the sugar disintegrate. Once you’re happy with your decorating, stick the cake pop into the Styrofoam or floral foam to cool and harden completely. Depending on the size of your foam, or number of pieces you have, you can doing 10 or so cake pops and stick them in the fridge to harden faster.

Once they’re done, you can either display them cake pop down in cute mini muffin cups, in a special lollipop stand, or floral foam covered with tissue paper or other type of fabric. You can also wrap them in little clear plastic candy bags and tie with a pretty bow! Have fun with it!
Tools
1 13×9-inch cake
1-2 cups of frosting
Cookie Scoop
Baking Sheet
Lollipop Sticks (like these)
Heat-proof bowl(s)
Candy Melts (like these), any color
Piece of Styrofoam or Floral Foam
Sprinkles, sugar, decorations (optional)
